Guide — Road Cycling
Bike Fitting Guide for Road Cycling 2026:
Get Your Position Right
A bad bike fit causes more drop-outs, injuries and wasted training than any other single factor. Knee pain, lower back pain, numb hands — almost always fixable with a proper position. A professional bike fit costs $150–$350. This guide gives you 90% of the result at zero cost, using a tape measure and 45 minutes.
Before you start: You need a helper for the saddle height and reach measurements. A mirror or camera works if you are riding solo. All measurements in this guide assume a standard road bike geometry (not TT or triathlon).
What You Need
- Tape measure
- Allen keys (4mm and 5mm for most saddle rails and stem bolts)
- Plumb bob or a weight on a string
- A helper, or a camera on a tripod
- Cycling shoes and pedals you will actually ride in
Step 1: Saddle Height
Saddle height is the single most important measurement in road cycling. Too low and you lose power and get knee pain at the front. Too high and your hips rock, causing lower back pain and knee pain at the back.
Measure your inseam
Stand barefoot against a wall. Place a hardcover book between your legs as if it were a saddle, level and firm against your crotch. Measure from the top of the book to the floor. This is your inseam length.
Calculate saddle height
Multiply your inseam by 0.883. This gives you your saddle height, measured from the centre of the bottom bracket axle to the top of the saddle (along the seat tube).
Example: 83cm inseam × 0.883 = 73.3cm saddle height
Check with the heel method
Sit on the bike on a trainer or against a wall. Place your heel on the pedal at the 6 o’clock position. Your leg should be completely straight with the heel on the pedal. If you have to rock your hips to reach, the saddle is too high. If your knee is still slightly bent, raise the saddle.
Step 2: Saddle Fore-Aft Position
Fore-aft sets where your knee sits over the pedal, which affects both power transfer and knee health. The classic method is KOPS (Knee Over Pedal Spindle).
KOPS check
Sit on the bike with the cranks at the 3 o’clock position (horizontal, crank arm pointing forward). Drop a plumb line from the front of your kneecap. It should fall directly over the pedal axle centre — or within 1–2cm behind it for most road riders.
Move the saddle forward on the rails to bring the knee forward. Move it backward to push the knee behind the axle.
Always re-check saddle height after adjusting fore-aft. Moving the saddle forward effectively lowers it slightly; backward raises it. A 1cm fore-aft shift = approximately 3mm height change.
Step 3: Saddle Tilt
Most riders do best with a level saddle or 1–2 degrees nose-down. A nose-up saddle compresses soft tissue and causes numbness. A nose-down saddle pushes you forward onto your hands, loading the wrists. Use a spirit level or a flat object placed on the saddle to check.
Step 4: Handlebar Reach
Reach is the distance from the saddle to the handlebars. Too long and your shoulders round and your back flattens; too short and you sit upright with no power transfer. Road cycling requires a flat, long back — not an upright MTB position.
Check your back angle
Ride normally with hands on the brake hoods. Have someone take a photo from directly to the side. Your torso should form approximately 45 degrees to the ground for endurance road riding — flatter (40°) for race-oriented riding, more upright (50–55°) for sportive/comfort riding.
Adjust with stem length or height
To reach further: fit a longer stem (10mm increments are common). To shorten reach: shorter stem. To raise the bars: add spacers under the stem or flip the stem if it is +/- adjustable. Stem lengths typically range from 80mm to 130mm on road bikes.
Step 5: Handlebar Drop
Drop is the height difference between the saddle top and the handlebar top. More drop = more aggressive, more aerodynamic. Less drop = more comfortable.
| Rider Type | Saddle-to-Bar Drop | Back Angle |
|---|---|---|
| Beginner / sportive | 0–4cm | 50–60° |
| Intermediate endurance | 4–8cm | 42–50° |
| Advanced road / race | 8–12cm | 38–42° |
| Pro race | 12cm+ | 35–38° |
Most cyclists who have not had a proper fit are running too much drop. Start conservative (less drop) and work your way down as flexibility and core strength improve over months of riding.
Step 6: Cleat Position
Cleat position affects knee tracking, power transfer and comfort on long rides. This is where most home fitters make mistakes — and where a professional fitter earns their fee.
Ball of foot over pedal axle
The widest part of your foot (the ball, behind the big toe) should sit directly over the centre of the pedal axle. Most cycling shoes have a reference line on the sole. If yours does not, measure 72–75% back from the tip of the shoe to the heel as a rough guide.
Rotational alignment (float)
Stand naturally. Notice the angle your feet point — most people have a slight toe-out angle. Your cleats should match this natural angle. Most road cleats offer 4.5° of float (SPD-SL) or 9° (Look Keo). Start with maximum float and reduce if you feel hot spots or your foot seeks a fixed position.
Quick Reference: Common Fit Problems & Fixes
| Problem | Likely Cause | Fix |
|---|---|---|
| Pain at front of knee | Saddle too low | Raise saddle 2–3mm |
| Pain at back of knee | Saddle too high | Lower saddle 2–3mm |
| Lower back pain | Too much reach or drop | Shorter stem / raise bars |
| Numb hands | Too much weight on hands | Raise bars, shorten stem |
| Numb saddle area | Saddle nose up, wrong saddle | Level saddle, try different saddle |
| Hip rocking | Saddle too high | Lower saddle 3–5mm |
| Foot hot spots | Cleat too far forward | Move cleat back 3–5mm |
When to Get a Professional Bike Fit
A home fit is excellent for getting within 5–10% of an ideal position. But there are situations where a professional fit is worth every cent:
- You have a recurring injury that persists after self-adjustment
- You are training for a gran fondo, sportive, or race
- You are buying a new bike and want to replicate your current fit
- You have had surgery on your knees, hips, or back
- You are significantly increasing training volume (100km+ per week)
Professional fits range from $150 (basic) to $350 (motion capture + video analysis). A good fit studio will give you a written report with all measurements, so you can replicate the position on future bikes.
Gear That Supports a Good Fit
Once your position is dialled in, the right pedals and helmet complete the picture. These are the two items that interact most directly with your bike fit.
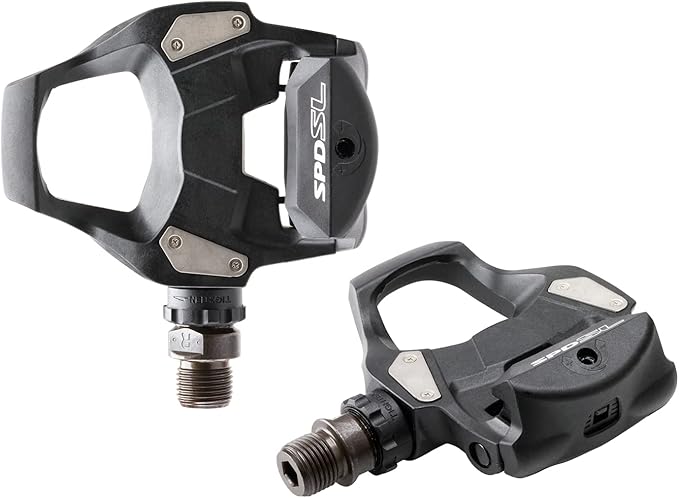
Fit-Friendly Pedals
Shimano PD-RS500 SPD-SL
4.5° float — ideal for riders dialling in cleat position. More forgiving than zero-float cleats during fit adjustment.
~$65
View on Amazon →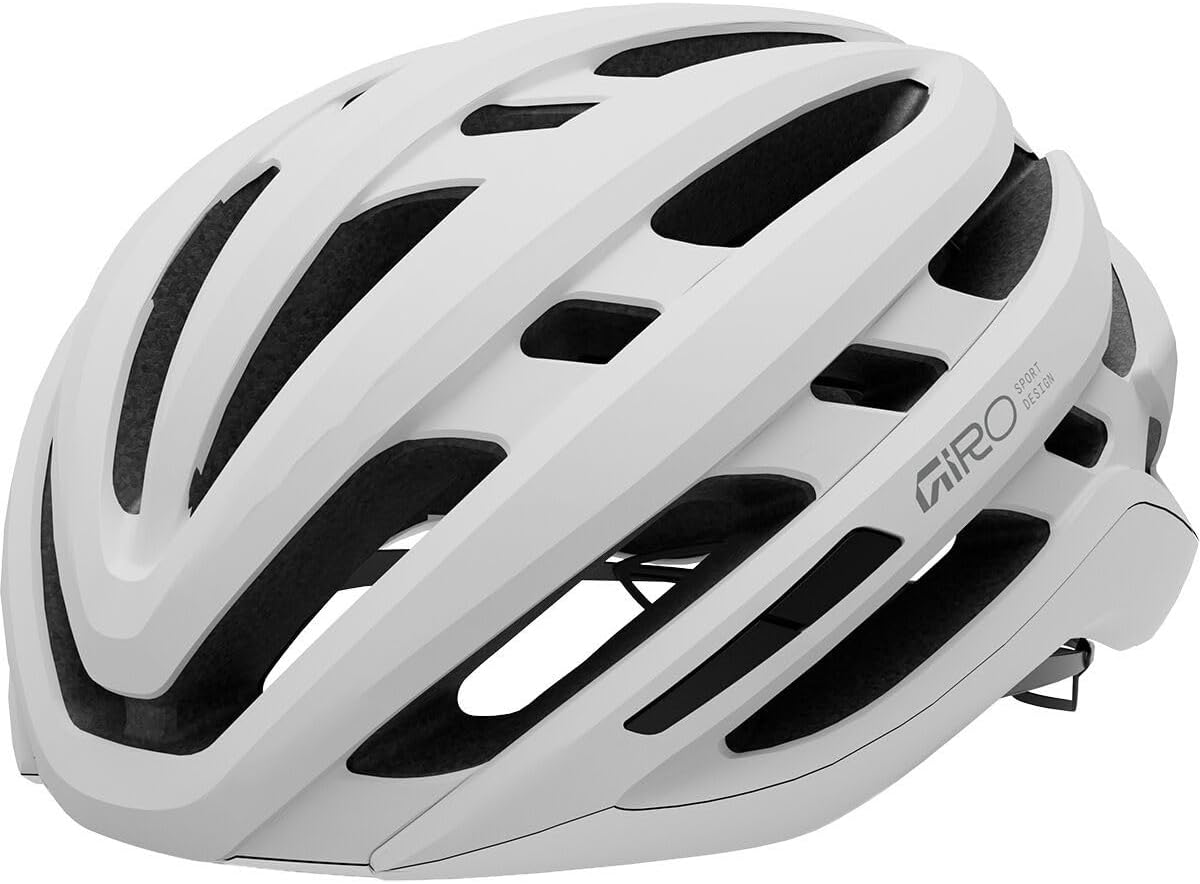
Once Your Fit Is Sorted
Giro Agilis MIPS
The helmet we recommend once your riding position is locked in. 25 vents, MIPS protection, Roc Loc 5 Air fit.
~$120
Check Price →Frequently Asked Questions
How do I know if my saddle height is correct?
Three checks: (1) Using the heel method, your leg should be straight with heel on pedal at 6 o’clock. (2) No hip rocking when pedalling normally. (3) A slight bend (about 30 degrees) at the knee when the pedal is at the bottom of the stroke with ball of foot on pedal. If all three are true, you are in the right range.
How long does a bike fit take at home?
Plan for 45–60 minutes the first time. Bring a notepad and write down every measurement before you start, then after each change. You will want to reference the original numbers if a change makes things worse. Subsequent tweaks can be done in 10–15 minutes.
Can I use this guide for a gravel bike?
Yes — all the saddle height, fore-aft and cleat calculations apply identically. The only difference is the target back angle: gravel riders typically run 5–8 degrees more upright than road riders for comfort on rough terrain. If you ride mixed surfaces, aim for 47–52 degrees torso angle.
Should I get clipless pedals before getting a bike fit?
Yes. Always complete your bike fit in the same shoes and pedals you will ride in. Your foot position changes significantly between flat pedals and clipless, and a fit done in flat pedals is invalid once you add cleats. If you are about to switch to clipless, do the fit after the switch.
What is the difference between a bike fit and a bike sizing?
Sizing determines which frame size to buy based on your body measurements. Fitting adjusts the bike you already have (or are buying) to your specific body proportions and riding style. You need both — but fitting is far more impactful, because a well-fitted medium frame beats a poorly-fitted large every time.
Found the right fit? See our 2026 guide to the best gravel bikes if drop bars and wider tires are next on your list.
More From CyclistStyle
Recent Posts
Want gear picks in your inbox?
Weekly reviews and buyer’s guides for road, MTB and e-bike riders.
Browse All Reviews →